Proxmox VE 在线扩容磁盘分区
约 216 字
预计阅读 1 分钟
次阅读
Proxmox VE 在线扩容磁盘分区
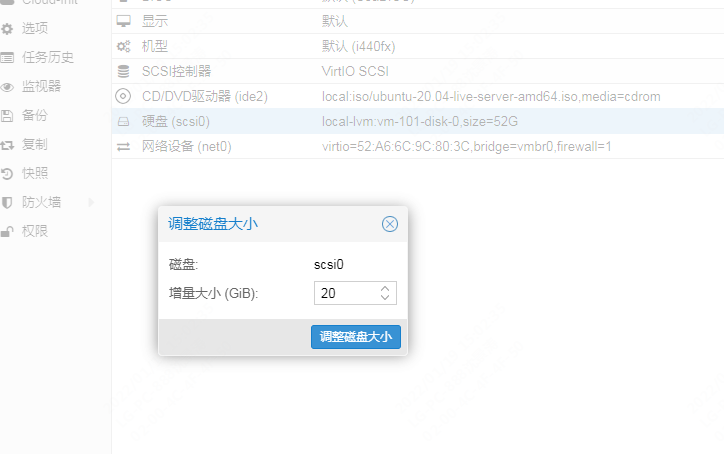
添加磁盘大小

在 VM 上做扩容操作
- 安装 growpart
1
2
|
yum install -y epel-release
yum install -y cloud-utils
|
- 查看系统盘 路径

- 扩容设备并重启
1
2
|
growpart /dev/sda 2 #2代表是第二块系统分区,不是sda2,中间有空格
reboot
|
- 重启执行命令
1
2
|
xfs_growfs /dev/sda2 #(xfs 文件系统)
resize2fs /dev/sda2 #(ext4 文件系统)
|
- 更新完成
逻辑卷没有正常扩容的情况
- 检查当前逻辑卷属于哪个卷组:

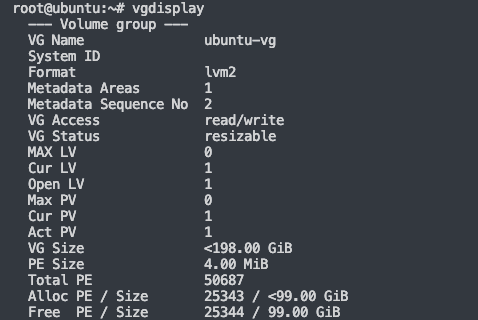
检查卷组中是有足够的空间可以扩容,还有99g
- 扩展逻辑卷大小到200G:
1
|
lvextend -L +99G /dev/mapper/ubuntu--vg-ubuntu--lv
|

- 调整文件系统大小到逻辑卷大小:
1
|
resize2fs /dev/mapper/ubuntu--vg-ubuntu--lv
|

4. 检查
1
|
df -h /dev/mapper/ubuntu--vg-ubuntu--lv
|
成功扩容


 打工人日志
打工人日志